I suffer from chronic DIY-itis. My son's first haircut is my most recent symptom (poor kid). I don't know if it's that I am trying to make up for the income I am not bringing in as a SAHM, or that I want to prove to myself and others that I am creative and capable, but I get great satisfaction out of doing and making things myself.
I've been a scrapbooker since I was in middle school, (all that time and I am still months, possibly years, behind!). Chronicalling special memories and events is soooo important to me, and I knew right away I would have a camera attached to my face from the second my son came into the world.
Like I mentioned before, I decided to do Oliver's portraits myself in part to save money and in part to impress family and friends with my DIY ability.
Here are the tips I've put together along the way:
1. Have a good, but realistic, camera. If I could afford an SLR camera then I could afford studio portraits. As much as I want one, I knew there was no reason to have this over a less expensive option. When we purchased our camera the sales person at Best Buy shared this opinion. We walked away with a Canon Power Shot SZ120 IS. Budget friendly AND it takes great pictures. I'm not technical enough to tell you what to look for in a camera, but test it out in the store and go with your gut. For me, the color quality when I reviewed the pictures and the clarity when you zoom in was the most important. I LOVE my camera (recently it made its way into Oliver's hands and then proceeded to make its way to the tile floor. It is out of commission and I am MISERABLE!).
2. Take advantage of natural lighting. It makes the biggest difference in the color quality of the pictures. Oliver was born in February so we were inside for most of his pictures. I waited for a bright sunny day and opened the curtains wide to let in as much light as I could. I tried putting lamps at the opposite end of the room from the window and it may have helped a little, but you ultimately have to wait until you have the most light flooding the room (of course it would help to have professional lights and reflectors...maybe someday I'll be so lucky).
3. Prepare. Have an idea of what you want in the background. Think of a nice outdoor setting if the weather permits. Buy basic black or white sheets. Come up with some prop ideas for baby to interact with. You don't need to sketch out a set design days in advance (in most cases I was throwing things together in a few minutes before starting our shoot), but start thinking about the photo opportunity as it approaches. I say this because...
4. ...you need to take advantage of baby's good mood. I have found that waking up from a nap works best with Oliver. The great thing about doing the pictures at home and on your own time is that you can wait for the ideal time when baby is happy and cooperative. These 3 month pictures were taken at three different times, whenever he seemed agreeable. I took advantage of the new session to change things up a bit and get different themes going.

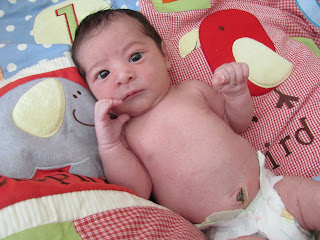
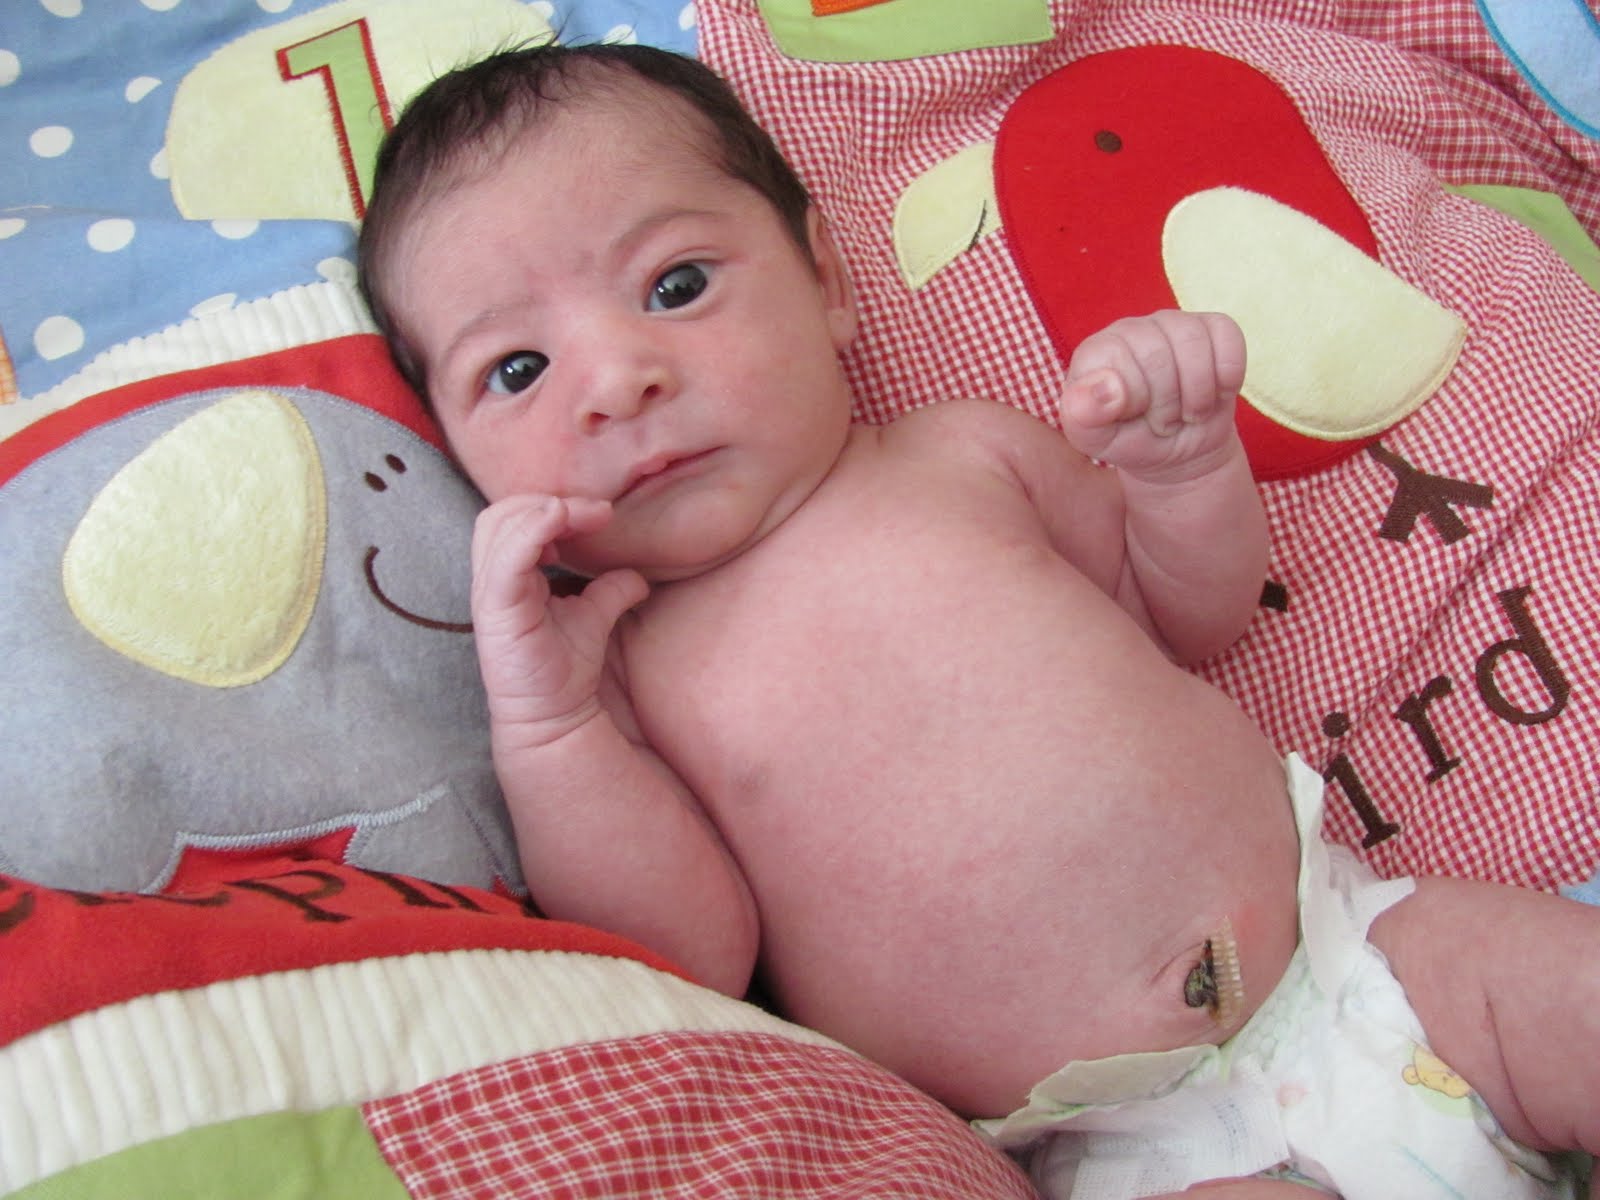
5. Pay attention to baby's comfort. New borns are pretty much going to go where you put them. If they aren't comfortable they can't adjust themselves and will cry and fuss and make a good shot hard to get. Oliver was not happy when we put him in his crib to take his newborn photos. I snapped a quick shot of his protest and then quickly called for the boppy pillow, covered it with his crib quilt and propped him up on it. Much MUCH better.
6. Play with angles. Everyday pictures are taken standing up and in front of the subject. To make these pictures special get down on the ground. Take the shot from the side. Get above the subject. Get a close up shot. The great thing about having digital cameras is the instant gratification- we get to see the result as soon as we take the picture...and delete it just as quickly if it isn't what we want.
7. Take your time. Like I said before...you're going off of baby's mood. If he gets tired or fussy, take a break. Hey- your not paying for studio time. Take what you can when baby's happy and you can always throw the sheet up again later in the day or even the next day.
8. Keep snapping! Take tons and tons of pictures. I never have less than 90 pictures whenever I do this and I can narrow it down to 30 that I love, then another look over has me realize there are 6 or 7 that great shots. As Mommy and Daddy you are going to love ALL of them! It's when you think: "Ok, if i had these done in a studio which ones would I print and share?" that you really weed it down. You'll get blurry shots, crying shots, hilarious expression shots...and GREAT shots if you just keep the camera clicking.
9. Some basic editing makes all the difference. It wasn't until I did Oliver's 12 month pictures that I even tried some advanced editing. Prior to that I would open up the photo in the Window's Media Gallery and simply crop it to my satisfaction and then click on auto adjust. Every once in a while I would play with the contrast and brightness and color ratio sliders...not that I knew what I was doing. My aunt is a graphics designer and quite talented with Adobe Photoshop. Every once in a while I would send things over to her to have them touched up. But, like I've said before, there's a certain pride about DIY and I wanted to edit the pictures myself. For Oliver's 12 month shots I did an internet search for good, free and easy photo editing software and downloaded Photoscape. I still really don't know what I'm doing with it and haven't found any good instructions, but it's fun to play with and if you don't like what comes out- don't save it. Just sharpening the contrast and adding a shadow or blur makes such a difference and the picture looks so professional.


Picture Ideas:
- The baby's crib is a great place for taking pictures. The gorgeous bumpers, quilts, sheets, and mobiles make a great backdrop. Not only will these pictures capture your precious newborn but it will serve to capture the memory of the nursery you put together during your nesting phase, the one you stood in with your hands on your swollen belly just waiting for baby to come.
- Everyone loves a naked newborn! Take some diaper shots against a white sheet for a simple, classic, memorable effect. Even lose the diaper and get an adorable tushy shot!


- Use brightly colored toys to keep baby entertained and document their play.
- Holiday decorations are fun to capture to document baby's age along with the season. I hung a fun halloween tablecloth against the wall to take shots of Oliver in his costume (ok you got me costumeS). An oversized teddy bear went well with Oliver's Christmas sweater for holiday cards, as did pictures of him decorating a mini tree with his dad.
- Take advantage of the seasons and the beautiful scenery nature provides. Sometimes these pictures are impromptu- a walk in the park can become a mini photo session.

- Find ways to keep older babys- the movers and shakers- entertained and contained. I sat Oliver in a rocking chair (which happened to be mine and my husband refinished...adding to the "awww") to keep him from walking away from our "set"
- Food pictures can be fun as well as messy. A friend of mine had a small chocolate cake for her son to dig into for his 12 month pictures. How fun right!? My take on it was to sit Oliver with a banana wearing a diaper and a yellow bib in front of a white sheet. I loved these shots because at the time the kid was obsessed with bananas and we called him our little monkey.